So You Bought a Carnivorous Plant… Now What?
First of all—congrats, you bold, bug-hating legend.
You didn’t just buy a plant.
You adopted a living, breathing, snack-hunting, drama queen of the botanical world.
And we LOVE that for you.
Whether you picked up a Venus flytrap, a sundew, a pitcher plant, or some other leafy assassin, this post will help you keep it happy, healthy, and hungry for more. (Insects, that is.)
🚨 IMPORTANT: Recommended Products & Acclimation Process
(Read this before your plant throws a tantrum.)
Shipping is stressful. New homes are scary. Your plant is basically saying:
👉 “I need spa conditions, patience, and the right tools… immediately.”
Follow these steps and your plant will reward you with growth, color, traps, dew, and fewer dramatic breakdowns.
💀 STEP 1: Growing Medium (RINSE IT OR REGRET IT)
⚠️ This step is NON-NEGOTIABLE. Skipping this can kill your plant.
✅ How to Rinse (The Easy Way)
- Put the dry growing medium directly into your planter.
- Place the pot in your sink.
- Fill with distilled, rain, or reverse osmosis water.
- Let it fully drain.
- Repeat TWO MORE TIMES (total of 3 rinses).
💀 Why this matters:
Unrinsed media contains salts and residues that burn roots and cause plant death.
Also—NEVER use growing medium with fertilizer added. That’s instant plant murder.
✅ Amazon-Tested Growing Media We Trust:
- Black Gold Canadian Sphagnum Peat Moss
- Besgrow Premium New Zealand Sphagnum Long Fiber Moss
- Better Gro Premium Grade Orchid Moss
- Organic Perlite with no fertilizer additives (NO fertilizer additives—ever!)
👉 These are the same brands we use in our own grow space.
🥩 STEP 2: Plant Food (Not Right Away, Hungry Hungry Hippo)
When your plant arrives, it’s busy:
- Making new roots
- Adjusting to new light
- Wondering what zip code it’s in
⚠️ DO NOT FEED FOR 2 WEEKS.
Feeding too early = stress overload = sad plant.
✅ After 2 Weeks, You May Begin Gentle Feeding With (Options):
- Gel Carnivorous Plant food
- Carnivorous Plant Food Liquid Drops - Seaweed and Blood Meal Blend
-
Maxsea 16-16-16 Fertilizer
- MUST be diluted
- ONLY applied by misting - ExtremeMist High-Performance Plant Mister
❌ Never pour into soil
❌ Never let the plant sit in fertilized water
👉 Think snacks, not buffet.
💨 STEP 3: Humidity, Heat & Light (The Plant Spa Experience)
Your plant will arrive slightly unhappy due to shipping. That’s normal.
You can fix its mood with humidity + warmth + gentle light.
The easiest way?
👉 A seed starter humidity dome setup for the first few weeks.
✅ New Plant Acclimation Checklist
(Do these steps in order. No plant shortcuts.)
- Unbox your plant
- Prepare & rinse growing medium (see Step 1 above – DO NOT SKIP)
- Plant your new plant in the rinsed medium and your choice of pot (do not plant in too large of a pot as the plant can remain too wet and rot)
- Place plant directly in the water tray for your chosen set-up (see below). You can also add rinsed horticulture small lava rocks (must be lava rocks intended for plant use)
- Add ½"–¾" inch of water
- Only distilled, rain, or reverse osmosis water
- Place the humidity dome on top
- Keep the dome holes CLOSED at first
- Turn on grow lights
- Use the built-in timer
- 12 hours on is ideal for starter domes
- Place the dome on a heat pad OR in a sunny window
- Check within a few hours for condensation
- Water droplets on dome walls = ✅ humidity success
- No droplets = ❌ add heat or move to sunnier spot
🦠 If Mold Appears (Rare but Fixable)
High humidity + low airflow can occasionally trigger mold.
✅ Mix:
- 1 part 3% hydrogen peroxide
- 8 parts distilled/rain/RO water
Lightly mist only the affected areas.
Mold problem solved. Plant drama canceled.
🌬️ OPTIONAL: If You Don’t Plan to Keep a Terrarium Long Term
(Results may vary—aka your plant might become needy.)
After 2 Weeks:
- Slowly crack open dome air holes
- Increase airflow gradually
After 4 Weeks:
- Remove dome for a few hours per day
- Gradually increase open-air exposure
- Watch closely for:
- Reduced dew
- Crispy edges
- Slowed growth
If you see those signs, you have three choices:
- Put the plant back in the humidity dome
- Reduce airflow again
-
✅ Buy a home humidifier and place the plant nearby
(Recommended models are listed below—yes, we tested them.)
🌿 Your Plant’s VIP Survival Kit (Amazon Edition)
Below is a recommended list of products you can purchase from Amazon to set your plant up for happy growth in the best way possible!
Yes—this is your plant’s glow-up starter pack, and yes—we use every single one of these with excellent results.
🌿 Humidity, Heat & Glow: The Ultimate Plant Setup Guide
(AKA: How to Keep Your Tropical Drama Queens Thriving)
If your plant likes it warm, humid, and glowing like a spa day, this guide is your cheat code to success.
Even better? Every setup below uses Amazon-friendly gear so you can build your plant paradise fast. 🌴⚡
💨 ROOM HUMIDIFIERS (For Open-Air Plant Setups)
Perfect if your plant is living its best life outside a dome or terrarium.
✅ BEST PICK (Our Top Recommendation)
- Built-in humidity monitor
- Large water tank (less refilling = more plant staring)
- Set your target humidity & let it auto-regulate
- Turns on & off automatically based on room conditions
👉 This is our favorite for precision plant pampering.
✅ SOLID BUDGET PICK
- Smaller tank
- Adjustable mist output
- Easy top-fill design
👉 Great starter option if you're testing the humidity waters.
🌡️ TEMPORARY LOW-COST SETUPS
(Perfect for rehab plants, babies, or “I need humidity NOW” moments)
🌱 SMALL SETUP
(Ideal for 1–2 small to medium plants)
👉 Perfect for carnivorous babies, baby alocasias, and nervous new imports.
🌿 LARGE SETUP
(Best for multiple small/medium plants)
👉 One box, instant jungle vibes.
🌴 TALL SETUP
(For taller plants or long-term terrarium use)
Choose one of the following:
Option 1:
Option 2:
👉 This is your “plants have floor-to-ceiling dreams” setup.
🔒 PERMANENT HUMIDITY DOMES & TERRARIUM BUILDS
(For collectors who don’t mess around)
🌱 SMALL TERRARIUM SETUPS
(1–2 small/medium plants)
Choose your base:
Then add:
👉 Perfect for carnivorous plants, rare imports, and humidity-obsessed divas.
🌿 LARGE COLLECTOR SETUPS
(For serious plant addicts with zero regrets)
Spider Farmer Covered Grow Racks with Lights
Add:
- ✅ Plant Heat Pad
- 1 pad for 59" and under
- 2 pads recommended for 71" tall
- Adjust the number of heat pads based on how cold/warm your location is for your plants. Warmer = less heat pads; Colder = more heat pads.
👉 These shelves turn your home into a full-blown plant command center.
🛒 Why We Recommend These Products
✅ We use these setups ourselves
✅ Proven success with humidity-loving plants
✅ Beginner-friendly
✅ Amazon-easy ordering
✅ Scales from “tiny baby plant” to “full jungle commander”
🌟 Final Pro Tip From Wild Wonders Oasis
Humidity + warmth + light =
Happy plants. Faster growth. Bigger traps. Better color. Less drama.
If your plant could talk, it would absolutely ask for:
✔ A dome
✔ A heat pad
✔ A proper grow light
✔ A humidity/temperature monitor
✔ And maybe a tiny plant robe
🧪 The Basics: Carnivorous Plants 101
Contrary to what cartoons told us, your new plant isn’t going to eat your cat. But it will happily slurp down fungus gnats, flies, mosquitoes, and the occasional confused ant. These plants evolved to thrive in poor, acidic soils by digesting bugs for nutrients.
They don’t want fertilizer (not a lot anyway). They don’t want tap water.
They want drama.
Let’s break it down by plant type:
🌱 Venus Flytrap (Dionaea muscipula)
The one with the snapping jaws and serious attitude.
-
Light: Full sun! 6+ hours daily or under strong grow lights.
-
Water: ONLY distilled, rain, or reverse osmosis. No tap. No exceptions.
-
Soil: 50/50 sphagnum peat moss + perlite. No fertilizer. No Miracle-Gro.
-
Dormancy: Yep, it naps in winter. Leaves may die back. Let it chill in a cool place and reduce watering.
-
Feeding: Outdoors? It’ll catch its own food. Indoors? You can feed it small live insects every 1–2 weeks. Do not overfeed.
🔥 Pro tip: Don’t trigger the traps for fun. It stresses them out and wastes their energy.
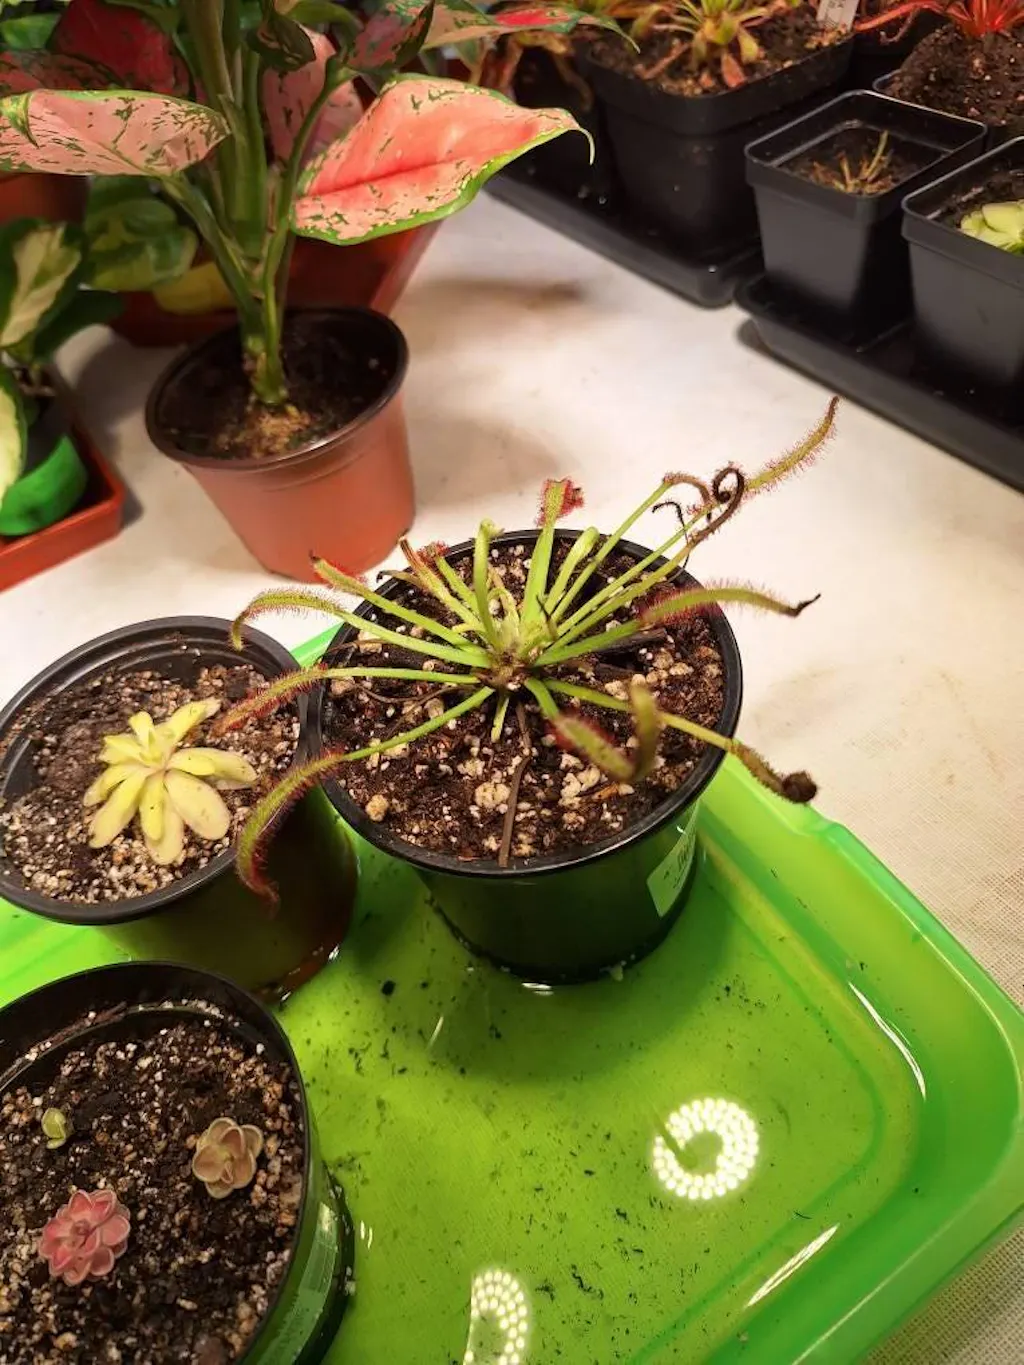
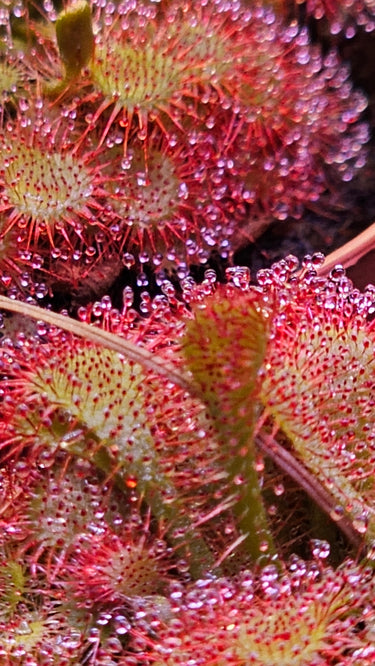
✨ Sundews (Drosera)
The glittery ones that trap bugs with sticky tentacle goo.
-
Light: Bright, direct light. They’ll get dewy and red with enough sun.
-
Water: Keep the soil consistently wet with distilled/rain/RO water.
-
Soil: Same as above—peat + perlite.
-
Feeding: These will catch plenty of bugs on their own, but you can supplement with tiny insects or even freeze-dried bloodworms rehydrated in water. Yep, they're that extra.
🌟 Look out for: Leaf curl = successful bug digestion. It’s like a victory dance.
🌱Pitcher Plants (Sarracenia, Nepenthes, etc.)
The elegant killers that lure bugs into doom-cups of digestive juice.
Sarracenia (North American pitcher plants):
- Light: All the sun it can get. These are outdoor warriors.
- Water: Always distilled/rain/RO water. Keep wet.
- Dormancy: Needs a winter rest—cool temps, reduced light and water.
- Feeding: Bugs fall in. The plant does the rest.
Nepenthes (Tropical pitcher plants):
- Light: Bright indirect light—avoid intense sun.
- Humidity: Loves 50–80%. Not a desert dweller.
- Water: Distilled only. Keep evenly moist.
- Feeding: You can drop bugs into pitchers if it’s not catching any. Think: crickets, mealworms, or your least favorite gnat.
🍷 Bonus fun fact: The pitchers actually digest prey with a sweet-smelling liquid inside. Science is wild.
🎁 Don’t Forget Your Discount!
You’ve got a 10% off code in your shipping box from your first order.
Use it to grab:
- A humid-loving sundew friend
- Or maybe… one more plant. (We don’t judge.)
👉 Shop now: wildwondersoasis.com
🌿 Stay wild, stay weird, and let your plants eat bugs in peace.
Welcome to the carnivorous crew.
Wild Wonders Oasis Team
Your friendly, bug-hating, rare-plant-obsessed team at Wild Wonders Oasis
Carnivorous Plants
Nature's Little Monsters with Style